A recorder fingering chart is a visual guide showing finger placements for producing notes. It helps musicians master recorder techniques, covering various sizes and fingering systems, ensuring accurate pitch and tone.
What is a Recorder Fingering Chart?
A recorder fingering chart is a visual guide illustrating finger placements for producing specific notes on the recorder. It maps the instrument’s holes to finger positions, including the thumb hole. Charts vary by recorder size (soprano, alto, tenor, bass) and fingering system (Baroque/English or German). Symbols like circles represent holes; filled circles indicate coverage. Alternate fingerings are often included for better pitch accuracy. PDF versions are widely available, providing clear, printable layouts for practice and reference, suitable for both beginners and advanced players.
Importance of Using a Fingering Chart
A fingering chart is essential for mastering recorder techniques, ensuring accurate pitch and tone. It provides clear finger placements for each note, aiding beginners in learning proper hand positioning and advanced players in refining their skills. Using a chart improves consistency, enhances practice efficiency, and helps musicians navigate different recorder sizes and fingering systems. Printable PDF versions offer convenience, making it easier to access and reference while learning or performing.
Types of Recorders and Their Charts
Recorders come in various sizes, including soprano, alto, tenor, and bass, each requiring specific fingering charts. Baroque and German systems differ in fingerings, especially for notes like F and B. Charts are tailored to each recorder type, ensuring proper hole coverage and pitch accuracy. Printable PDF charts are available for all sizes, providing clear layouts for both systems. This variety allows players to master their instrument, whether soprano, alto, or larger recorders, with precise finger placements for optimal sound quality and playability.
Understanding Recorder Anatomy
The recorder has a mouthpiece, thumb hole, and seven finger holes, with a back thumb hole for covering. The bell amplifies sound. These parts work together to produce clear tones when fingers cover the holes correctly, as shown in fingering charts.
Parts of the Recorder
The recorder consists of a mouthpiece, thumb hole, seven finger holes, and a bell. The mouthpiece is where air is blown, while the thumb hole is covered by the left thumb. The seven finger holes are arranged along the body, with the back thumb hole controlling pitch and tone. The bell amplifies the sound. Understanding these parts is essential for proper fingering and sound production, as detailed in fingering charts for various recorder sizes and systems.
Thumb Hole vs. Finger Holes
The thumb hole, located on the recorder’s back, is covered by the left thumb, while finger holes are on the front, covered by the fingers of both hands. The thumb hole is crucial for tuning and octave changes. Finger holes produce different notes when covered or uncovered in various combinations. Charts distinguish between thumb and finger placements, showing solid circles for covered holes and open circles for uncovered ones, ensuring clear guidance for musicians.
Understanding the Layout
A recorder fingering chart’s layout uses circles to represent holes, with filled circles indicating covered holes and open circles for uncovered ones. The thumb hole is often shown outside the main grid, while finger holes are arranged in a pattern mirroring the recorder. This visual organization helps musicians quickly identify proper finger placements for each note. The chart’s design ensures clarity, making it easier to learn and master various notes and techniques across different recorder sizes and fingering systems.

Basic Fingering Techniques
Basic fingering techniques involve proper placement of fingers and thumbs to cover holes accurately, ensuring clear note production. Proper hand positioning and consistent finger placement are essential for precise pitch and tone control.
Fingering on the recorder involves covering and uncovering holes with fingers and thumbs to produce different notes. Charts visually represent these finger placements, with black circles indicating covered holes and white circles indicating uncovered ones. The thumb hole, located on the back, is essential for lower notes. Proper fingering ensures clear, resonant tones. Beginners often start with simple fingerings for notes like C and D, gradually progressing to more complex placements. Practice with a chart helps develop muscle memory and consistency in sound production across all octaves.
Proper Hand Positioning
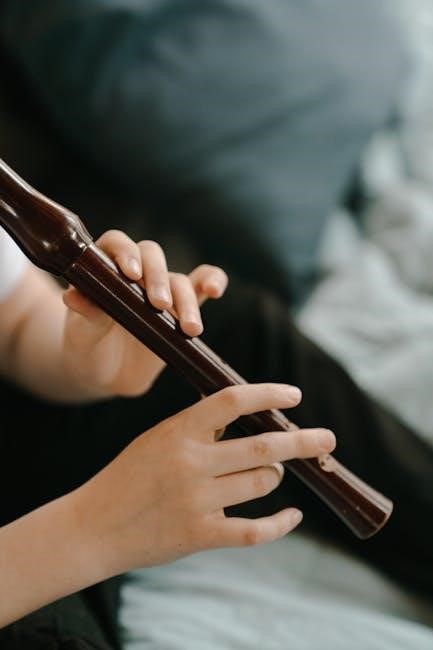
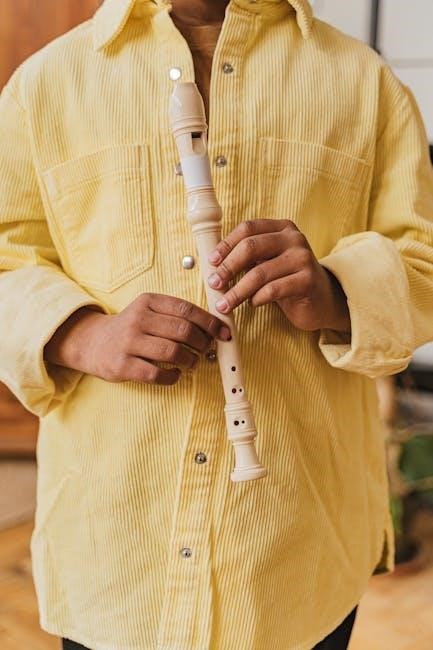
Proper hand positioning is crucial for effective recorder playing. The left hand is placed at the top, covering the upper holes, while the right hand is at the bottom, managing the lower holes. The thumb of the left hand covers the back thumb hole, stabilizing the recorder. Fingers should be gently curved, covering holes completely to ensure clear tone production. Proper posture and finger alignment prevent fatigue and promote accurate fingering, enhancing overall performance and sound quality.
Thumb and Finger Placement
Proper thumb and finger placement is essential for accurate notes. The left thumb covers the back thumb hole, while the fingers cover the front holes. The left hand typically uses the index, middle, and ring fingers, while the right hand uses the index, middle, and little fingers. The little finger may cover the lowest hole or assist with octave tuning. Fingers should cover holes completely, avoiding gaps for clear tone production. Correct placement ensures proper pitch and prevents muffled sounds, enhancing overall performance quality and consistency.
Soprano Recorder Fingering Chart
The soprano recorder fingering chart provides a detailed guide for playing notes from C to high D. It includes Baroque and German fingering systems, ensuring clarity and precision in performance.
Baroque (English) Fingering System
The Baroque (English) fingering system is a traditional method for soprano recorders. It uses specific finger placements for each note, ensuring accurate intonation and ease of play. Common notes like C, D, and E are covered with simple fingerings, while sharps and flats require precise hole coverage. This system emphasizes clarity and resonance, making it ideal for historical and classical repertoire. Charts are widely available for reference and practice.
German Fingering System
The German fingering system differs from Baroque, primarily in note F and F#. It offers alternative fingerings for better pitch accuracy and playability. Charts detail each note’s finger placement, including sharps and flats. This system is popular for its simplicity and clarity, making it accessible for learners and professionals alike. Available PDF charts provide comprehensive guides for mastering the German fingering technique across various recorder sizes, ensuring consistent tone quality and ease of use.
Alternate Fingering Options
Alternate fingerings provide optional ways to play notes, enhancing flexibility for musicians. These options are especially useful for tricky passages, offering easier transitions or better intonation. PDF charts often highlight these alternatives, allowing players to choose the most comfortable or accurate method. Exploring alternate fingerings can improve technique and musicality, making performances more expressive and polished across all recorder sizes and systems.

Alto Recorder Fingering Chart
The Alto Recorder Fingering Chart offers detailed finger placements for Baroque and German systems, covering the instrument’s range. It serves as a visual guide for proper techniques and note accuracy.
The Baroque (English) fingering system is a traditional method for playing the recorder, emphasizing natural finger placement. It uses the thumb hole on the back and specific fingerings for each note. This system is known for its clarity in producing pitches, especially in historical music. The Baroque system differs from the German system, particularly in fingerings for F and high E. It covers notes from F to G in the alto recorder. PDF charts are available, detailing finger placements for both Baroque and German systems, aiding in mastering the instrument effectively.
The German fingering system offers an alternative to the Baroque method, primarily differing in the placement for notes F and high E. It is designed for simplicity and ease, often preferred by beginners. The German system uses fewer alternate fingerings, making it accessible for learning. PDF charts for the German system are widely available, providing clear visuals for each note. This system is compatible with various recorder sizes, ensuring consistent playing across soprano, alto, and tenor recorders. It focuses on producing accurate pitches with minimal finger movement.
Alternate fingerings provide additional ways to play notes, enhancing pitch accuracy and comfort. These options are especially useful for tricky notes like A, B, and C. PDF charts often highlight these alternatives, allowing players to choose the most convenient method. Alternate fingerings can improve intonation and reduce finger strain, making them invaluable for both beginners and advanced players. They are clearly marked in fingering charts, ensuring easy identification and practice.

Tenor Recorder Fingering Chart
The tenor recorder fingering chart provides detailed finger placements for producing notes across its range. It includes both Baroque and German systems, with specific fingerings for lower notes.
The Baroque, or English, fingering system is a traditional method used for recorders. It emphasizes specific finger placements to achieve clear, resonant notes. This system is commonly used for soprano and tenor recorders, offering a consistent approach to playing. The charts detail thumb and finger positions, including open and covered holes, to produce accurate pitches. Baroque fingering is preferred for its historical authenticity and rich tone quality, making it ideal for classical and early music performances.
The German fingering system differs from the Baroque system, primarily in its approach to certain notes like F and F#. It uses fewer fingers, simplifying some fingerings for easier learning. This system is widely used in educational settings due to its intuitive nature. Charts for German fingerings detail specific hole coverages, emphasizing clarity and pitch accuracy. Unlike the Baroque system, it avoids complex alternate fingerings, focusing on a more straightforward method. This makes it ideal for beginners and modern repertoire.
Alternate fingerings provide additional techniques for playing specific notes, enhancing pitch accuracy and intonation. They are especially useful for tricky transitions or complex passages. These options often involve different finger combinations, allowing players to choose the most comfortable or effective method. Charts highlight these alternatives, offering flexibility for various musical styles and recorder sizes. By mastering alternate fingerings, musicians can improve their overall performance quality and adaptability. This versatility is a valuable asset for both beginners and advanced players seeking refinement in their playing.

Bass Recorder Fingering Chart
The bass recorder fingering chart provides detailed finger placements for low-pitched notes, covering both Baroque and German systems. It includes alternate fingerings for improved intonation and ease of play.
The Baroque or English fingering system is a traditional method used for recorders, emphasizing simplicity and clarity. It covers the entire range of notes, with specific finger placements for each pitch. This system is widely used in historical and classical music, offering precise intonation and control. The charts provide clear visuals, indicating thumb and finger positions, including open and covered holes. They are essential for mastering the recorder’s distinctive tone and technique across various sizes, from soprano to bass.
The German fingering system offers an alternative to the Baroque method, primarily differing in finger placements for specific notes like F and F#. It provides a more straightforward approach for certain pitches, enhancing playability and intonation. Designed for ease of use, this system is particularly popular in educational settings. German fingering charts detail thumb and finger positions, including alternate options for notes like high E. They are widely available online, covering the full range of recorder sizes and pitches.
Alternate fingering options provide additional ways to play certain notes, offering flexibility for better pitch accuracy or comfort. These options are particularly useful for tricky notes like high E or low C. Charts often indicate alternate fingerings with secondary symbols or numbers, allowing players to choose the most comfortable or effective method. While standard fingerings are sufficient, alternates can enhance performance and adapt to individual playing styles, making them a valuable resource for both beginners and advanced recorderists.

How to Read a Fingering Chart
A fingering chart uses circles to represent holes, with black circles indicating covered holes. The thumb hole is shown outside the box, and numbers or symbols denote finger placements; Properly aligning fingers and thumbs ensures correct note production. Practice interpreting the chart to master note fingerings efficiently.
Understanding the Symbols
The symbols on a recorder fingering chart represent the instrument’s holes. Black circles indicate covered holes, while white circles are uncovered. The thumb hole is often shown outside the box. Numbers or letters may label fingers or specific techniques. Arrows or lines can denote breath direction, tuning adjustments, or alternate fingerings. Open holes are left blank, while partially covered holes may be indicated by shaded circles. These symbols guide proper finger placement and breath control for accurate note production and tone quality.
Interpreting Hole Coverage
Hole coverage on a recorder fingering chart indicates which holes to cover with fingers or the thumb. Fully covered holes are marked with black circles, while white circles remain uncovered. Partially covered holes may be shaded or marked with lines, showing how much of the hole should be blocked. The thumb hole, often outside the main diagram, is essential for lower notes. Proper coverage ensures correct pitch and tone, with slight variations affecting intonation and articulation. Accurate interpretation is key to mastering recorder technique and achieving desired sounds.
Practicing with the Chart
Practicing with a recorder fingering chart enhances finger dexterity and note accuracy. Start by matching notes on the chart to those in your music, ensuring proper finger placement. Begin with slower tempos, gradually increasing speed as familiarity grows. Regular practice helps build muscle memory, making complex passages easier. Use the chart to identify alternate fingerings for tricky notes, improving pitch accuracy and overall performance. Consistent practice with the chart leads to mastery of the recorder’s fingering system and a broader musical repertoire.

Advanced Fingering Techniques
Advanced techniques include trills, ornamentation, and alternate fingerings for complex passages. These methods enhance musical expression and provide options for intricate note transitions, refining your recorder skills.
Trills and Ornamentation
Trills and ornamentation add flair to recorder playing. Trills involve alternating between two notes using nearby fingers. Mordents and grace notes are common ornaments. Proper finger dexterity and breath control are essential. Using alternate fingerings can facilitate smooth transitions. Practice trills in different ranges to build mastery. Start with slower tempos and gradually increase speed. Incorporate ornaments like trills and mordents to enhance musicality. These techniques require precise finger placement and airflow control, as shown in fingering charts.
Advanced Alternate Fingerings
Advanced alternate fingerings offer enhanced control and agility for complex passages. They provide options for notes like A, B, and C#, improving pitch accuracy. These fingerings are especially useful for trills and intricate ornaments. Practicing alternate fingerings refines technique and expands musical expression. They are often used in Baroque and German systems, varying slightly between soprano and alto recorders. Mastering these fingerings requires precise finger placement and breath control, as detailed in fingering charts for advanced players.
Special Effects and Techniques
Special effects and techniques enhance recorder playing with unique sounds. Vibrato adds emotional depth by varying pitch subtly. Glissando creates smooth transitions between notes, while staccato shortens them for rhythmic clarity. Dynamics, from pianissimo to fortissimo, add contrast. Overtones and multiphonics extend the sound palette. These advanced methods, guided by fingering charts, allow for expressive performances, particularly in Baroque music. Mastery of these techniques expands the recorder’s versatility and artistic potential, making music more engaging and sophisticated.
Downloadable PDF Resources
Recorder fingering charts are widely available as downloadable PDFs, offering detailed guides for various recorders and systems. These charts can be printed for easy reference, ensuring accurate fingering techniques and enhancing practice sessions with clear visual aids.
Where to Find Recorder Fingering Charts
Recorder fingering charts are available online as downloadable PDFs from reputable sources like the American Recorder Society and Dolmetsch Musical Instruments. Websites offer charts for soprano, alto, tenor, and bass recorders, covering both Baroque and German fingering systems. Many music education platforms and instrumental resources provide these charts for free, ensuring easy access for learners. Printable PDFs include detailed diagrams, note ranges, and alternate fingerings, making them indispensable tools for practice and performance.
How to Print and Use the Charts
Download the PDF fingering charts from trusted sources like the American Recorder Society or Dolmetsch Instruments; Print them on standard paper for easy reference. Use the charts to identify finger placements for each note, ensuring proper technique. Highlight or mark alternate fingerings for quick access. Reference the diagrams during practice to master notes and improve accuracy. Keep charts near your recorder for consistent learning and performance.
Creating Your Own Chart
To create a custom recorder fingering chart, start by identifying your recorder type and size. Research standard fingerings for your instrument, noting Baroque and German systems. Include alternate fingerings for tricky notes. Use graphic design tools to map finger placements visually. Ensure clarity by distinguishing thumb holes from finger holes. Add symbols for open and covered holes. Test the chart with a tuner for accuracy. Share your chart with fellow musicians for feedback and refinement. This personalized approach enhances learning and performance.
Mastering recorder fingering charts is essential for skill development. Consistent practice and exploration of advanced techniques will enhance your musicianship. Dedication leads to enjoyable performance.
Recap of Key Points
Recorder fingering charts are essential tools for learning proper finger placements and note production. They vary by recorder size (soprano, alto, tenor, bass) and fingering system (Baroque/English or German). Understanding these charts helps musicians produce accurate pitches and tones. Consistent practice with the chart improves technique and musicianship. Additionally, downloadable PDF resources provide convenient access to fingering guides, making it easier to master recorder playing. Regular review ensures mastery of both basic and advanced techniques.
Encouragement to Practice
Consistent practice is key to mastering the recorder. Start with short sessions, focusing on proper finger placement and breath control. Use the fingering chart as a guide to explore notes and techniques. Set achievable goals, such as learning a new note or improving tone quality. Celebrate small progress to stay motivated. Remember, patience and dedication will enhance your skills and bring joy to your playing. Enjoy the journey of mastering this versatile instrument!
Final Tips for Mastery
To achieve mastery, practice regularly and mindfully. Focus on proper hand positioning and finger dexterity. Use the fingering chart to explore alternate fingerings for better pitch accuracy. Listen to recordings to develop tone and phrasing. Experiment with different dynamics and articulations. Join a group or seek a teacher for feedback. Stay patient and persistent, as mastery takes time. Embrace challenges and enjoy the process of refining your skills and expressing yourself through music.

Appendix
The appendix provides additional resources, including a glossary, troubleshooting tips, and printable PDF charts for various recorders, ensuring comprehensive support for all skill levels of musicians.
Glossary of Terms
Baroque Fingering: A traditional system emphasizing specific finger placements for historical accuracy. German Fingering: An alternative system known for simplified fingerings, especially for notes like F and F#. Thumb Hole: Located on the recorder’s back, it’s crucial for lower notes. Fingering Chart: A visual guide mapping finger placements to notes. Alternate Fingerings: Optional techniques for better pitch accuracy or comfort. Recorder Sizes: Include soprano, alto, tenor, and bass, each with unique charts.
Additional Resources
For further learning, visit the American Recorder Society website for comprehensive guides. Dolmetsch Musical Instruments offers detailed charts and historical insights. Search online for German fingering specifics. Explore Recorder Fingering Chart PDFs for printable versions. Utilize music education platforms for interactive tools and tutorials. These resources enhance mastery and provide diverse learning opportunities for all skill levels, ensuring a well-rounded understanding of recorder techniques and fingerings.
Troubleshooting Common Issues
Common issues with recorder playing include air leaks, uneven tone, and difficulty reaching high notes. Ensure proper finger placement and hole coverage. For air leaks, check seal around the thumb hole. For unclear notes, adjust breath control and finger placement. Experiment with alternate fingerings for tricky notes. Regularly clean the recorder to prevent blockages. Practice long tones to improve pitch accuracy. Adjust fingering techniques for different recorder sizes and systems, such as Baroque or German fingerings, to achieve consistent sound quality and intonation.